
Add a KVM host
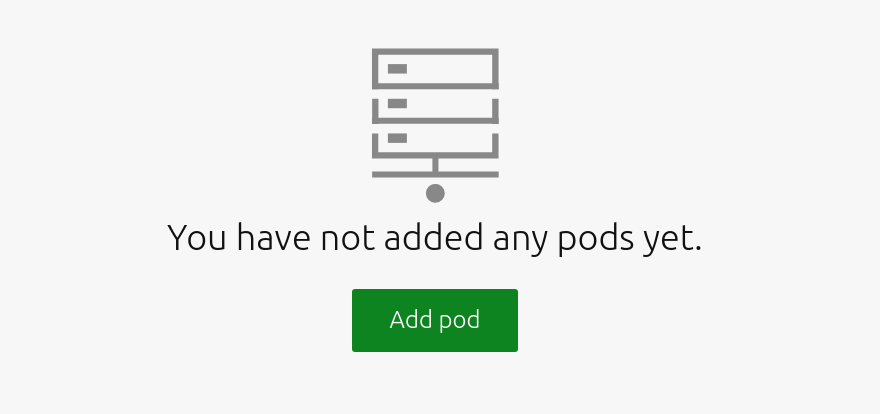
After installing MAAS, the ‘Pods’ page is typically empty:
2.5+
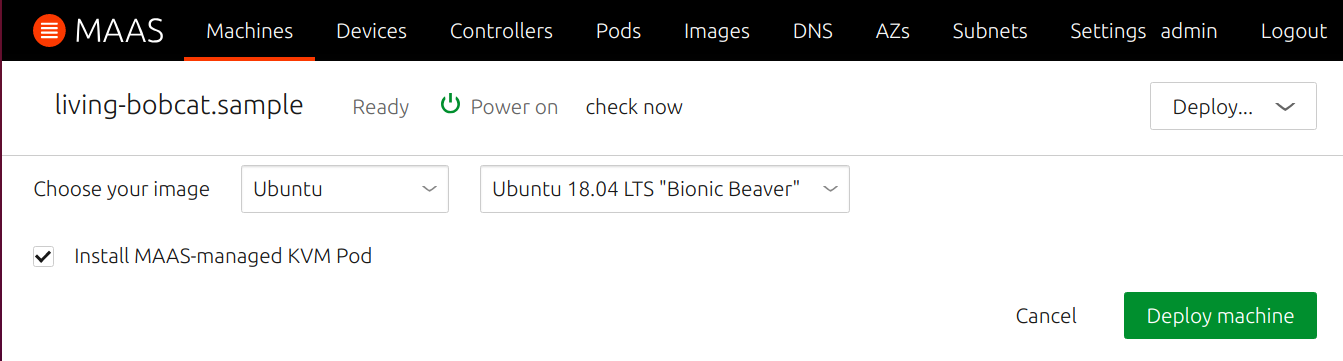
Once a machine as been added to MAAS and gone through enlistment, commissioning and hardware testing, you can deploy it (after acquiring it) as a KVM host by ticking the ‘Install MAAS-managed KVM Host’ checkbox:
You can also use the MAAS CLI to deploy a machine to use as a KVM host.
Manual/Pre-2.5
Setting up a manual KVM host in 2.5 or on an older version of MAAS requires more steps.
Set up a `maas` libvirt network
Libvirt by default creates a virtual bridge, virbr0, through which VMs communicate with each other and the Internet. DHCP is supplied by libvirt so that new VMs are automatically given an IP address.
However, to enable network booting in MAAS, you’ll need to provide DHCP in MAAS and either:
- Disable DHCP on libvirt’s
defaultnetwork, or - Create a new libvirt network
maaswith DHCP disabled.
You can set up such a maas network like this:
cat << EOF > maas.xml
<network>
 <name>maas</name>
 <forward mode='nat'>
   <nat>
     <port start='1024' end='65535'/>
   </nat>
 </forward>
 <dns enable="no" />
 <bridge name='virbr1' stp='off' delay='0'/>
 <domain name='testnet'/>
 <ip address='172.16.99.1' netmask='255.255.255.0'>
 </ip>
</network>
EOF
virsh net-define maas.xml
Note that this network also has NAT port forwarding enabled to allow VMs to communicate with the Internet at large. This is useful in test environments.
Set up SSH
In order for MAAS to successfully communicate with libvirt on your KVM host machine, this example command must succeed from every rack controller as user maas:
virsh -c qemu+ssh://$USER@$KVM_HOST/system list --all
Here, $USER is a user on your KVM host who is a member of the libvirtd unix group on the KVM host, and $KVM_HOST is the IP of your KVM host.
The maas user on your rack controllers will issue all virsh commands. Therefore, you’ll need to set up SSH public keys on every rack controller for user maas.
To do this, first create SSH keys on all rack controllers:
sudo chsh -s /bin/bash maas
sudo su - maas
ssh-keygen -t rsa -N ''
Next, add the contents of ~maas/.ssh/id_rsa.pub to the KVM host user’s ~$USER/.ssh/authorized_keys. To do this, you can, for example, log into your KVM host node via SSH from a host for which you provided MAAS an existing public SSH key (e.g. your imported Launchpad keys).
Insufficient permissions for $USER may cause the virsh command to fail with an error such as failed to connect to the hypervisor. Check the $USER group membership to make sure $USER is a member of the libvirtd group.
Add
Now, add a KVM host by using the ‘Add pod’ button. Choose ‘Virsh (Virtual systems)’ from the ‘Pod type’ drop-down menu.
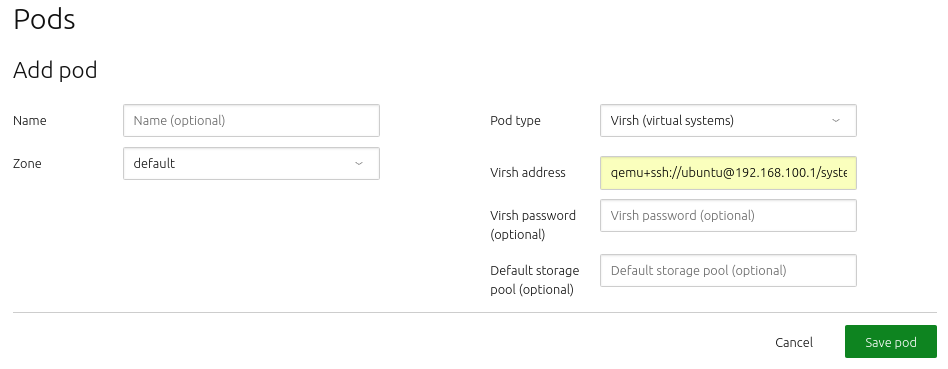
Here, ‘Virsh address’ typically looks like the following:
qemu+ssh://<kvm host IP>/system
MAAS will automatically discover and store the resources your KVM host contains. Any existing machines will also appear on the ‘Machines’ page and be commissioned.
Add an RSD Pod
Add an RSD Pod by using the ‘Add pod’ button. Choose ‘Rack Scale Design’ from the Pod type drop-down menu.
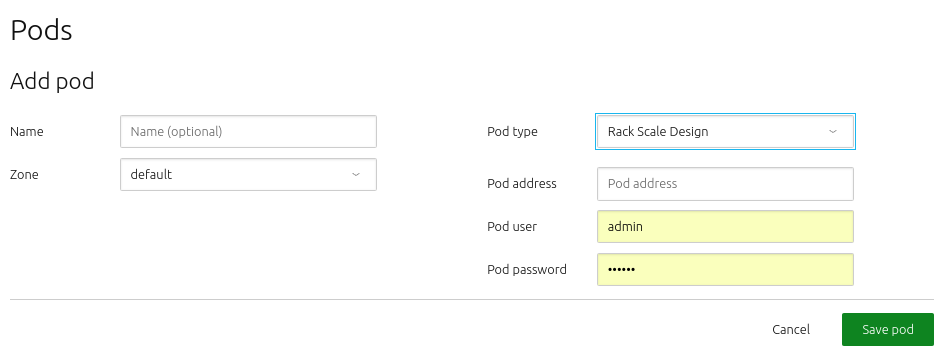
You will need to get values for ‘Pod address’ (IP address or URL followed by a port), ‘Pod user’, and ‘Pod password’ from your RSD administrator.
MAAS will automatically discover and store the resources your RSD Pod contains.
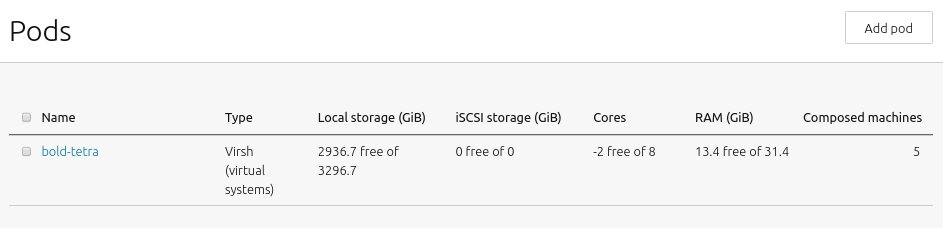
List pods
Pods and a summary of their resources are listed on the ‘Pods’ page:
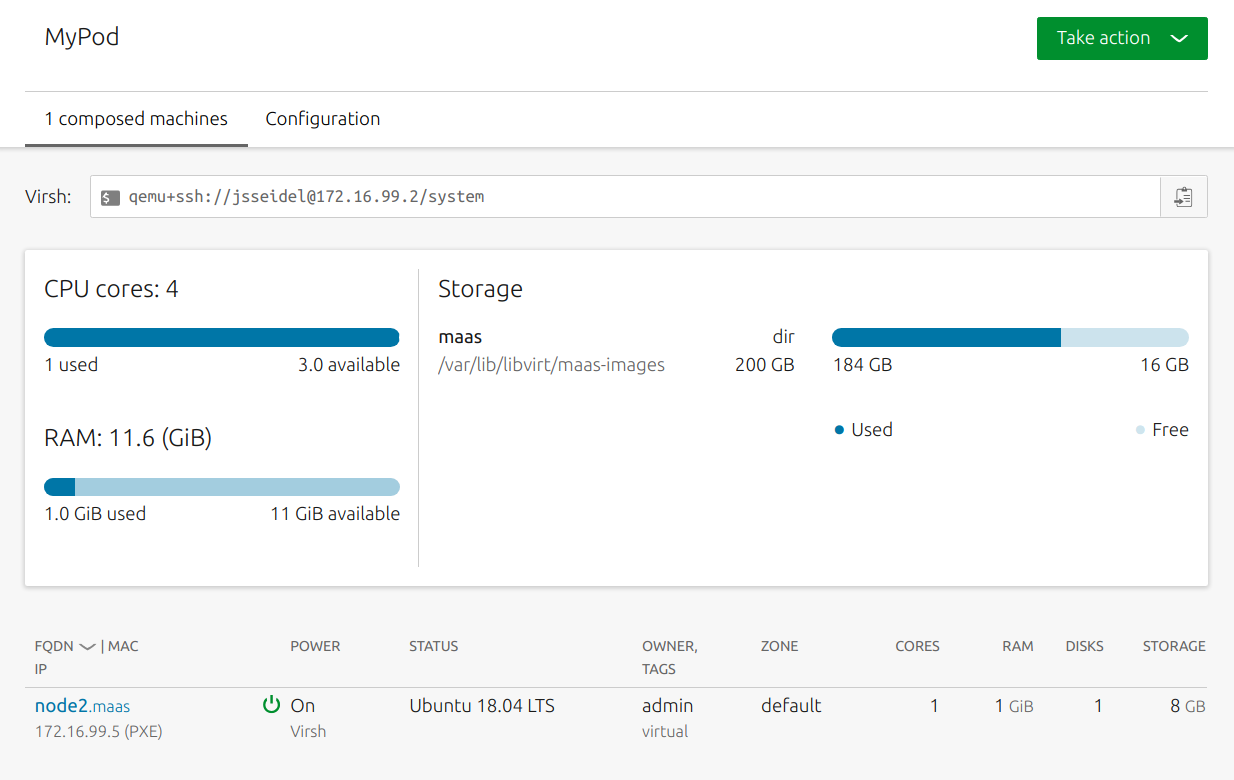
View pod details
One the ‘Pods’ page, click a pod’s name to show the resources that belong to it, including total number of CPU cores, the amount of total RAM and local storage. These values update to reflect usage and remaining resources.
The main view also lists the machines contained within the pod.

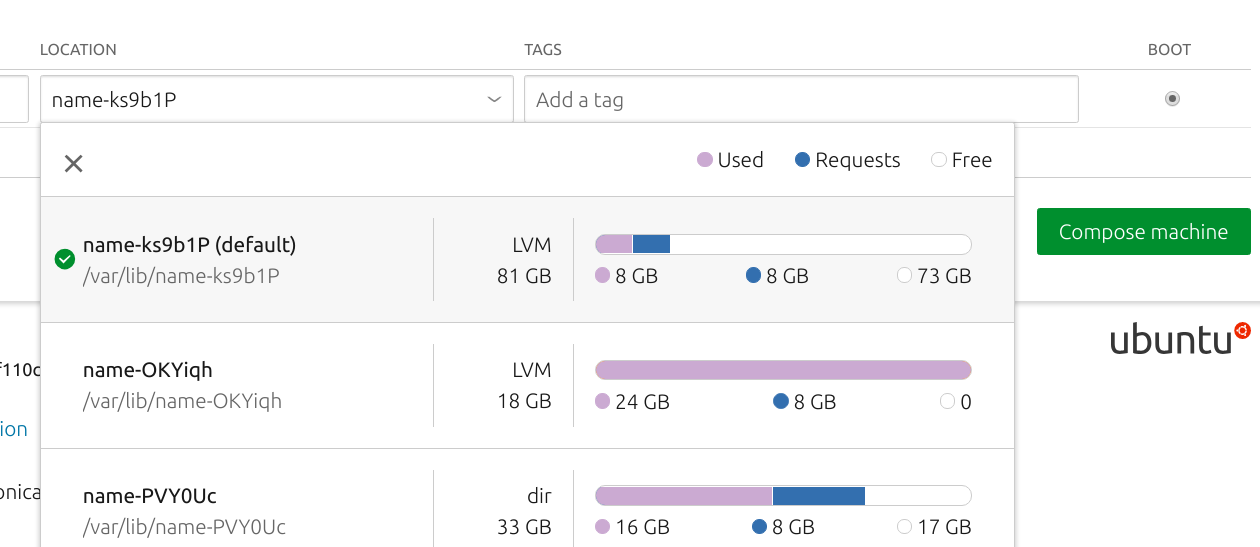
KVM host storage pools
Libvirt “storage pools” are storage resources managed by libvirt. For a more in-depth take on libvirt storage pools, see here.
MAAS displays information about each pod’s storage pools so you can understand your resource usage at a glance:

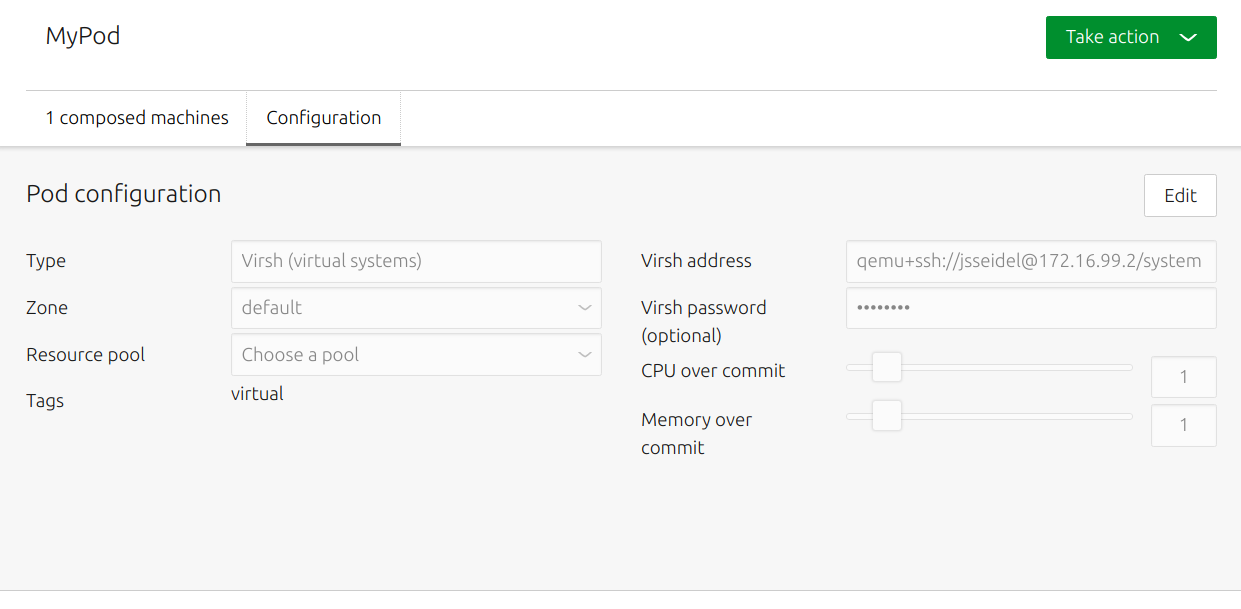
Configuration
Pods have several configuration options. Modify these by selecting the ‘Configuration’ tab and clicking ‘Edit’. Options include a pod’s location, password, network zone, and default resource pool.
Overcommit resources
Overcommitted resources are those allocated beyond what’s available in the physical resource. Sliders on the configuration page allow you to strictly limit whether CPU and memory can be over committed, and to what extent. The input fields to the right of the sliders accept floating point values from 0 to 10, with a default value of 1.
The following shows theoretical examples of these ratios and how they affect physical resource allocation:
8 physical CPU cores * 1 multiplier = 8 virtual CPU cores8 physical CPU cores * 0.5 multiplier = 4 virtual CPU cores32 physical CPU cores * 10.0 multiplier = 320 virtual CPU cores128GB physical Memory * 5.5 multiplier = 704G virtual Memory
Overcommitting resources allows a user to compose many MAAS-managed machines without worrying about the physical limitations of the host. For example, on a physical host with 4 cores and 12 GB of memory, you could compose 4 virsh nodes, each using 2 cores and 4 GB of memory, obviously over-committing the available physical resources. Provided you never run all 4 simultaneously, you’d have all the benefits of MAAS-managed VMs without over-taxing your host.
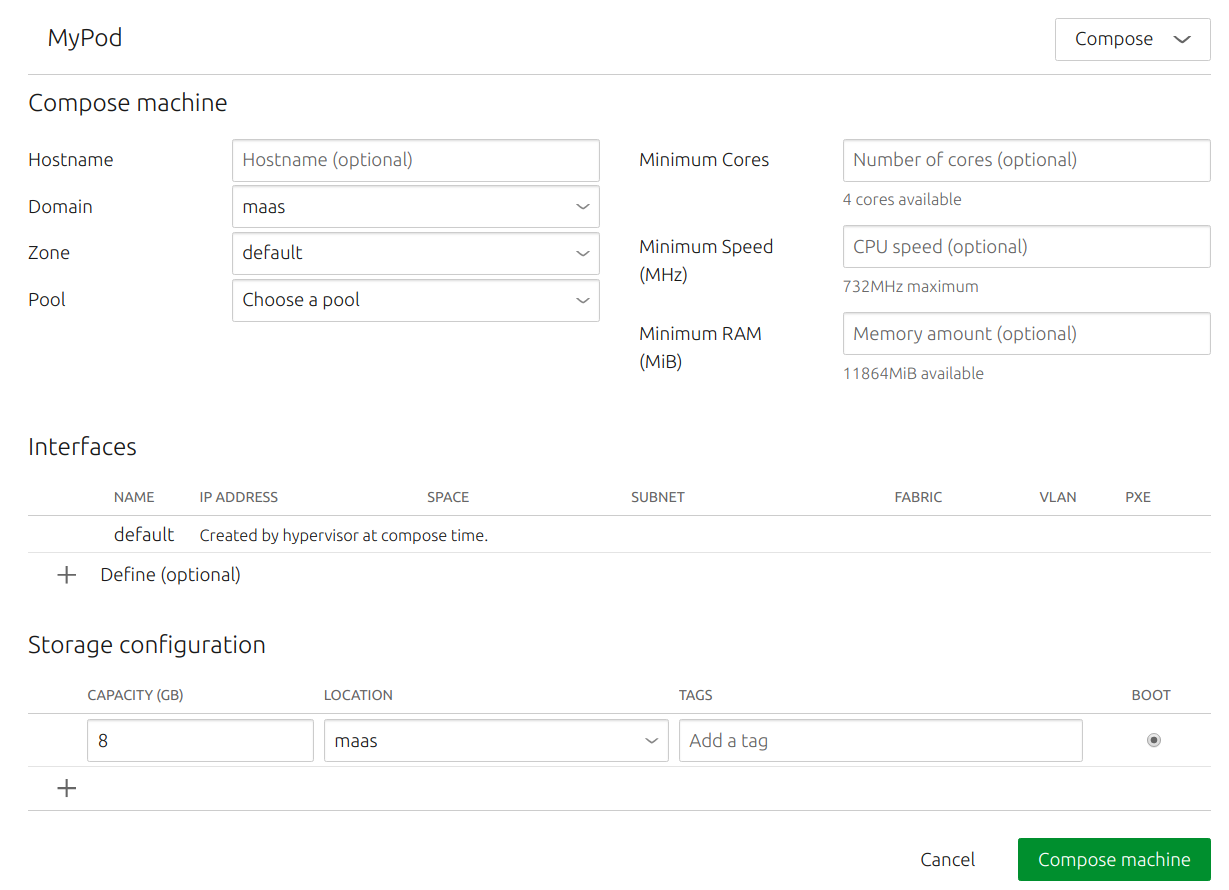
Compose a machine
While on a pod’s details view, select ‘Compose’ from the ‘Take action’ drop-down menu to compose a machine.
You can choose which storage pool to use from a drop-down list:
You can also use the MAAS CLI to compose pod VMs with specific storage pool constraints.
Click the ‘Compose machine’ button when you’re finished. MAAS will present the pod detail view. In a few moments, your new machine will be auto-commissioned. The ‘Machines’ page will reflect this as well.
The new machine’s resources will be deducted from the pod’s resources:
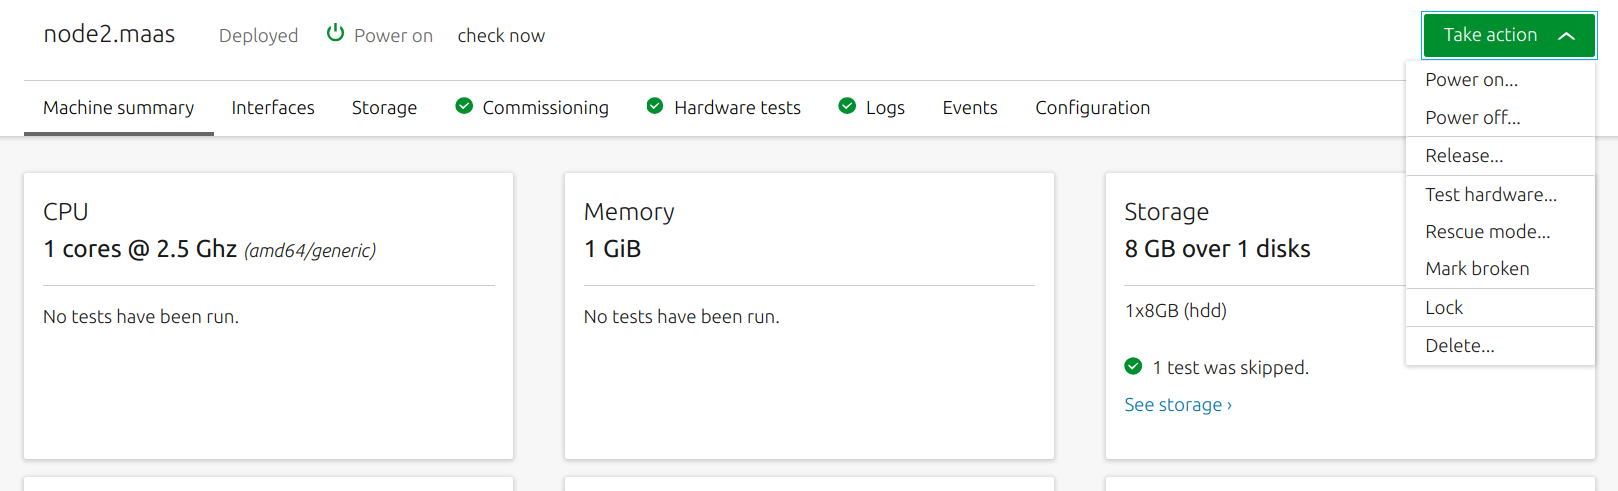
Delete a machine
To delete a machine, simply delete it as you would any other MAAS node. Select the desired machine from the list of machines and select ‘Delete’ from the ‘Take Action’ menu.
Delete a pod
While on the main pods page, select a pod and choose the ‘Delete’ action from the ‘Take action’ dropdown menu. Click ‘Delete 1 pod’ to confirm the action:

Deleting a pod will also delete all its machines and remove them from MAAS.