
In MAAS-managed networks, you can further manage your subnets with a reserved range of IP addresses. You can reserve IP addresses by adding one or more reserved ranges to a subnet configuration. You can define two types of ranges: reserved ranges and reserved dynamic ranges.
A reserved range operates differently depending on whether the subnet is managed or unmanaged. For a managed (subnet), MAAS will never assign IP addresses inside this range. You can use this range for anything, such as infrastructure systems, network hardware, external DHCP, or an OpenStack namespace. For an unmanaged (subnet), MAAS will only assign IP addresses inside this range – but MAAS can assign any IP within this range.
A reserved dynamic range is used by MAAS for enlisting, commissioning and, if enabled, MAAS-managed DHCP on the machine’s VLAN during commissioning and deployment. If created with the Web UI, an initial range is created as part of the DHCP enablement process. MAAS never uses IP addresses from this range for an unmanaged subnet.
This article gives specific instructions about creating and managing IP ranges.
Three questions you may have:
- How do I create an IP range?
- How do I edit an existing IP range?
- How do I delete an existing IP range?
Create a range
To create a range with the web UI, choose the “Subnets” option across the top:

In the “SUBNET” column, choose the subnet for which you want to create an IP range(s):

Scroll down to “Reserved ranges” on the subnet screen and click on the “Reserve range” drop-down:

Choose ‘Reserve range’ or ‘Reserve dynamic range’. If you choose the latter, MAAS will automatically provide DHCP for enlistment and commissioning provided that the associated VLAN has DHCP enabled. Read the DHCP page.
When you choose either of those two options, a window will appear allowing you to enter start and end addresses for the range as well as a comment.
Below is an example window when creating a ‘reserved range’ (the windows are identical):
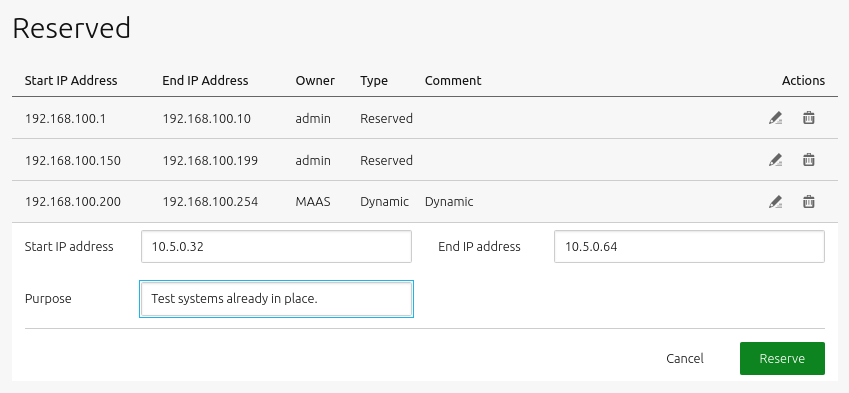
Click the ‘Reserve’ button when done.
Edit a range
Click the ‘Menu’ button at the far right of the row corresponding to the subnet in question and select ‘Edit reserved range’ from the menu that appears. Edit the fields as desired and click the ‘Save’ button.
Delete a range
Select ‘Remove range’ from the menu that appears when clicking the ‘Menu’ button at the far right of the row corresponding to the subnet in question.