
This page is deprecated. Please see the new Pods section in the navigation column.
Pods
Pods, or composable hardware, allow for the dynamic composition of nodes from a pool of available hardware resources (e.g. disk space, memory, cores).
This enables a machine request to be made without having machines pre-built. Modelling tools, such as Juju, can leverage this functionality when requesting a machine from MAAS, which will dynamically create and Deploy one. Machines can also be requested directly from within MAAS.
MAAS currently supports two such architectures:
- Intel Rack Scale Design (RSD)
- Virsh (KVM)
For RSD, MAAS has only been validated to work with Intel RSD reference software release v.1.2.5, based on Redfish API v.1.0 and RSD PODM API v.1.0.
See MAAS CLI - Composable hardware for how to manage composable hardware with the CLI.
Virsh pods
Networking
When using Virsh pods, the KVM host will typically have a network bridge set up with a libvirt network configured to use it.
Alternatively, if KVM and MAAS reside on the same system, the default NAT libvirt network can be used by disabling DHCP on it and enabling MAAS DHCP on the VLAN associated with the libvirt subnet of 192.168.122.0/24.
MAAS checks to see if DHCP is managed by libvirt before attaching to a libvirt network named maas or default. (Note that if DHCP is managed by libvirt, MAAS will not be able to PXE-boot machines.)
MAAS will fall back to attaching to a libvirt-managed network known to be DHCP-enabled in MAAS, even if that network is not associated with a network in libvirt.
MAAS supports more complex methods for assigning interfaces to pods using the CLI.
Storage
Virsh pods can optionally use a default storage pool. This feature uses storage tags to map a storage pool in libvirt with a storage tag in MAAS.
- With no default storage pool defined, MAAS selects the storage pool with the most available space.
- When a default storage pool is defined, all machines subsequently composed within the pod will have their storage block devices created from the default storage pool.
See libvirt storage for more information.
You can use the MAAS CLI to track libvirt storage pools.
Supported architectures
MAAS KVM pods support i386-, amd64-, ppc64el- and arm64-based architectures, provided hypervisors for these architectures are running at least Ubuntu 18.04. MAAS KVM pods running on amd64 support older versions of Ubuntu.
Web UI
See Web UI for how to get started with the web UI.
Composable hardware systems are managed on the ‘Pods’ page, which is initially empty:
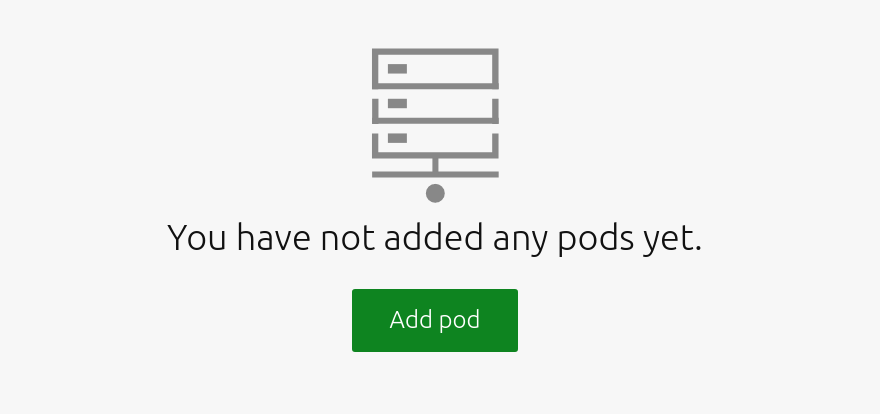
Add a pod
Add/register a pod by using the ‘Add pod’ button.
The first example depicts an RSD Pod being added. After choosing ‘Rack Scale Design’ for ‘Pod type’ the below form will appear:
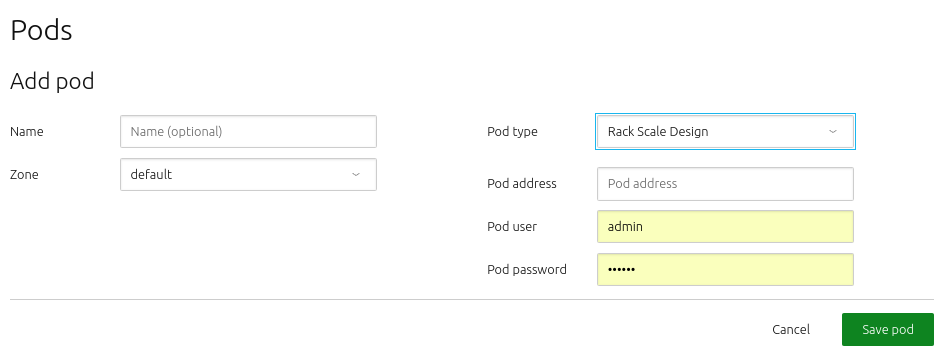
Fill in the fields. You will need to get values for ‘Pod address’ (IP address or URL followed by a port), ‘Pod user’, and ‘Pod password’ from the RSD administrator. Then click ‘Save pod’.
Once added, MAAS will automatically discover and store the resources that a pod contains. Any pre-composed machines will also appear on the ‘Machines’ page and be commissioned.
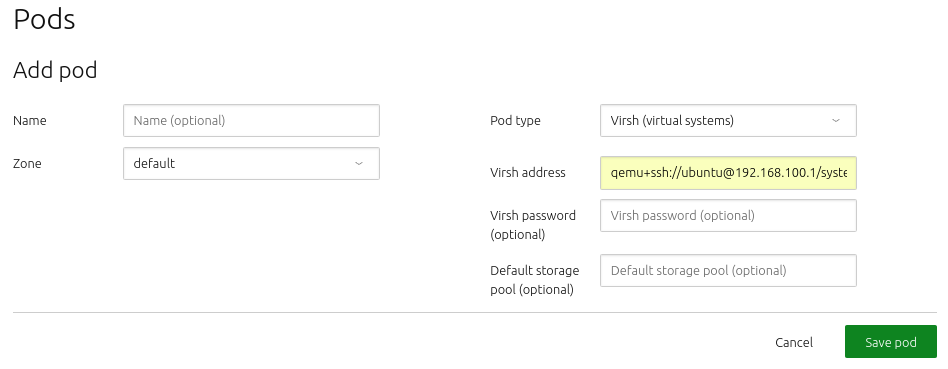
Virsh pods
This is how a virsh pod is added:
List pods
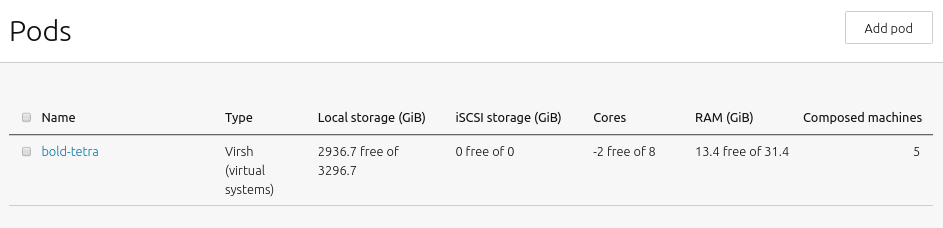
The new pod, including a summary of contained resources, will be listed on the ‘Pods’ page:
View pod details
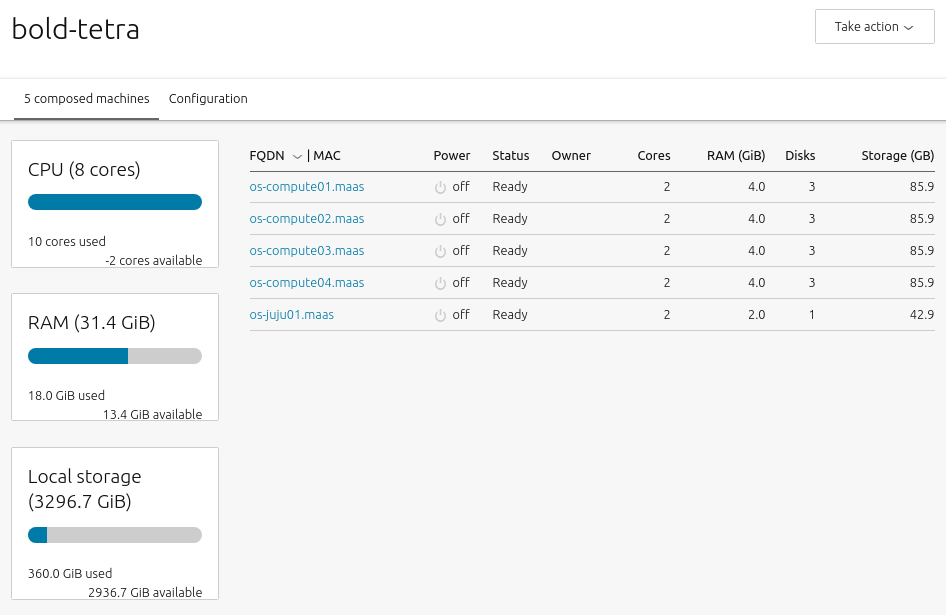
Clicking a pod’s name on the ‘Pods’ page will reveal the resources contained within it, including its total number of CPU cores, the amount of total RAM and local storage. These values update to reflect usage and remaining resources.
The main view also lists the machines contained within the pod.
Configuration
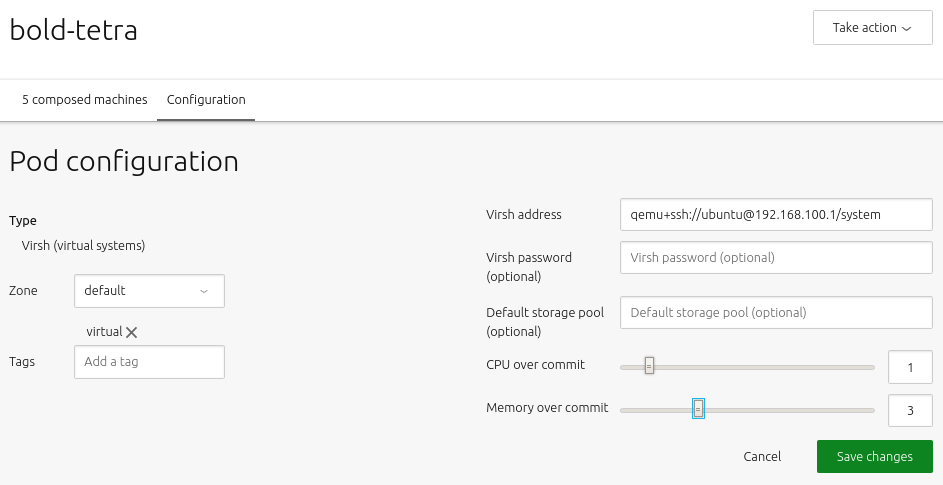
Pods have several configuration options. These are modified by selecting the ‘Configuration’ tab and clicking ‘Edit’. Options include a pod’s location, password, network zone.
On Virsh pods, you can also change the default storage pool. Additionally, two sliders are used to set over commit ratio multipliers for CPU and memory resources.
Over committed resources are those allocated beyond what’s available in the physical resource. These sliders allow you to strictly limit whether CPU and memory can be over committed, and to what extent. The input fields to the right of the sliders accept floating point values from 0 to 10, with a default value of 1.
The following shows theoretical examples of these ratios and how they affect physical resource allocation:
8 physical CPU cores * 1 multiplier = 8 virtual CPU cores8 physical CPU cores * 0.5 multiplier = 4 virtual CPU cores32 physical CPU cores * 10.0 multiplier = 320 virtual CPU cores128GB physical Memory * 5.5 multiplier = 704G virtual Memory
Over committing resources allows a user to compose many MAAS-managed VMs without worrying about the physical limitations of the host. For example, on a physical host with 4 cores and 12 GB of memory, you could compose 4 virsh nodes, each using 2 cores and 4 GB of memory, obviously over-committing the available physical resources. Provided you never run all 4 simultaneously, you’d have all the benefits of MAAS-managed VMs without over-taxing your host.
Compose a pod machine
While on a pod’s details view, begin the machine composition process by selecting ‘Compose’ from the ‘Take action’ dropdown menu:
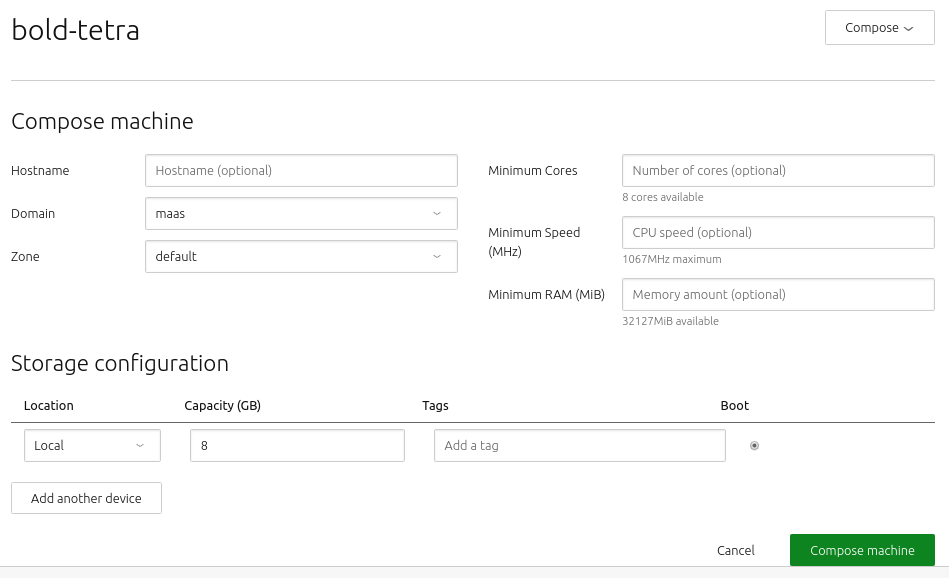
Fill in the fields (many are optional) and hit ‘Compose machine’ to finish. You will be brought back to the pod’s details view. In a few moments the new machine will be auto-commissioned.
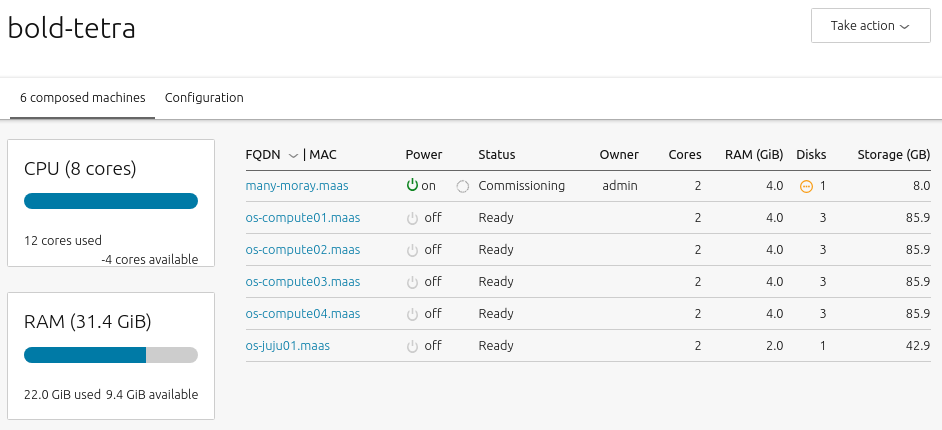
The main ‘Machines’ page should reflect this as well.
As expected, the new machine’s resources will be deducted from the pod’s resources:
Decompose a pod machine
Decomposing a pod machine means to send the machine’s resources back to the pod for reuse. Doing so within MAAS will also cause the corresponding MAAS node to be Deleted.
While on a pod’s details view, select the machine to decompose and choose the ‘Delete’ button from the dropdown menu:

Confirm by hitting the ‘Delete machine’ button.
This operation can also be achieved by simply deleting the corresponding MAAS node in the regular way.
Once done, you will be transported back to the main ‘Machines’ page.
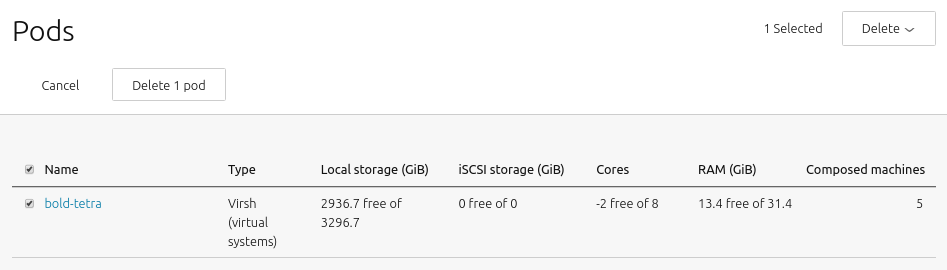
Delete a pod
While on the main pods page, select a pod and choose the ‘Delete’ action from the dropdown menu. Hit ‘Delete 1 pod’ to confirm the action:
Deleting a pod will also decompose all its machines, thereby also removing all corresponding nodes from MAAS.