
MAAS LXD authentication enhancements
This iteration, we want to make authentication with LXD more secure in MAAS. Originally, when authenticating with LXD, MAAS only requires the LXD host address and optional trust password. However, we want to establish a more secure connection between MAAS and LXD using a certificate to authenticate. With that in mind, we drafted out a prospective authentication flow for the purpose of security and error tolerance as our main focus, while making the experience easy to use.
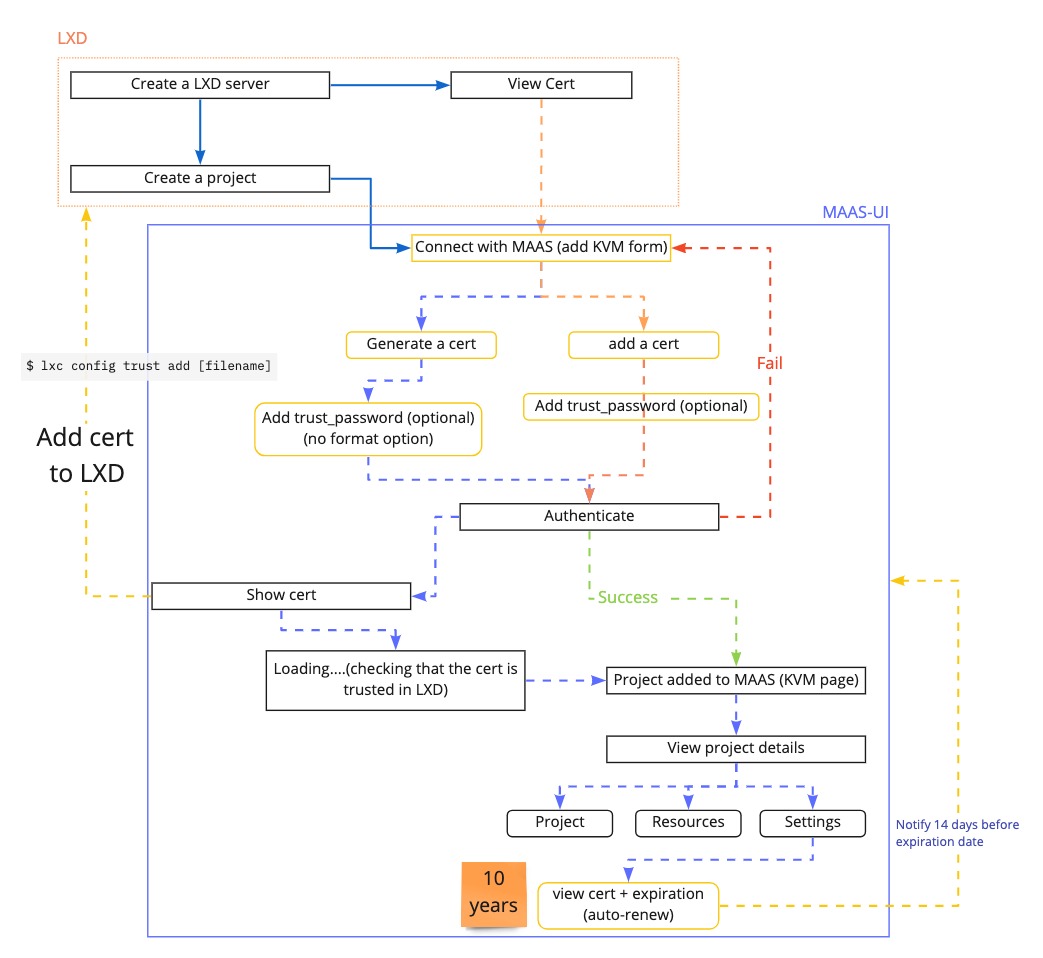
The current problem with our authentication is that when establishing a connection between LXD and MAAS, MAAS will generate a different certificate for each authentication even though it is with the same server. So we tried to revert this problem and use the same key for the same LXD server. When generating a certificate with MAAS,
MAAS will generate a secret key and certificate pair to use with a LXD server. Whereas the MAAS name is used as a CN.
If a user also already has a certificate generated from their LXD server they can curl their certificate from LXD and add it to MAAS as an alternative way to authenticate.
The key points were the following:
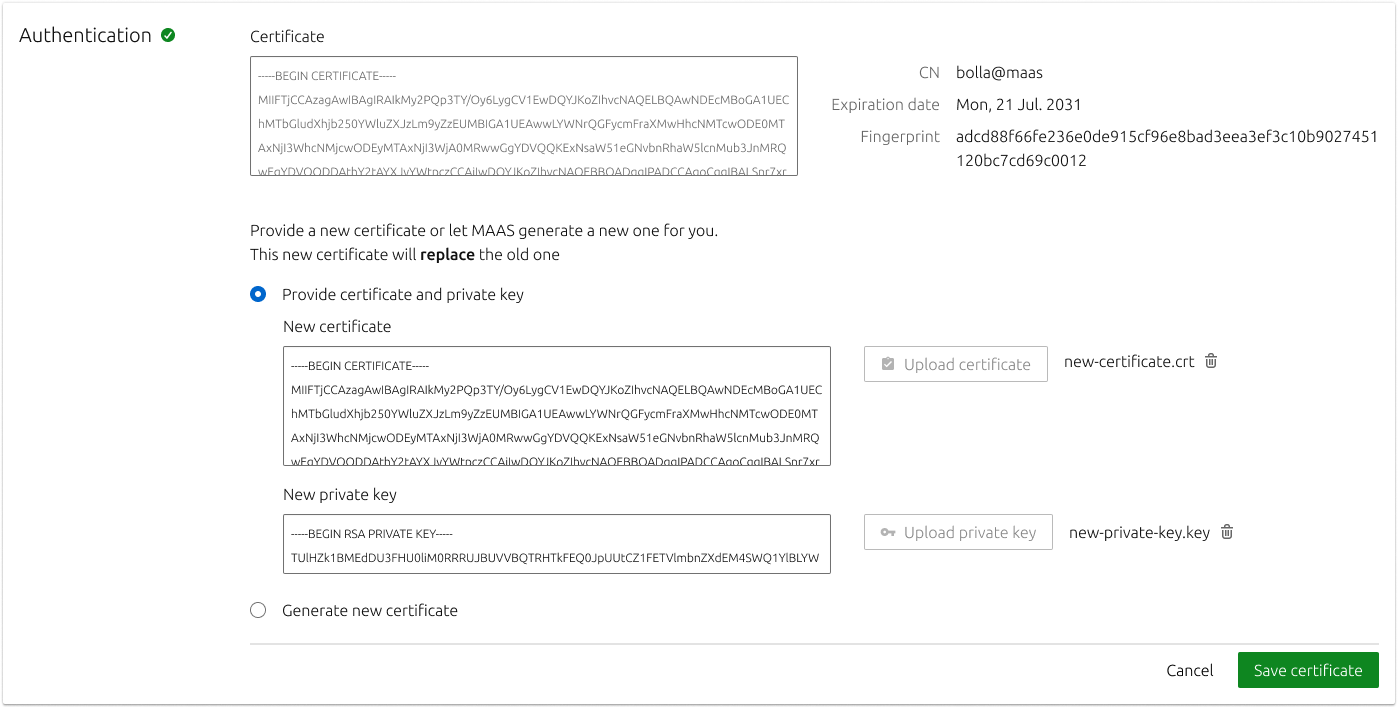
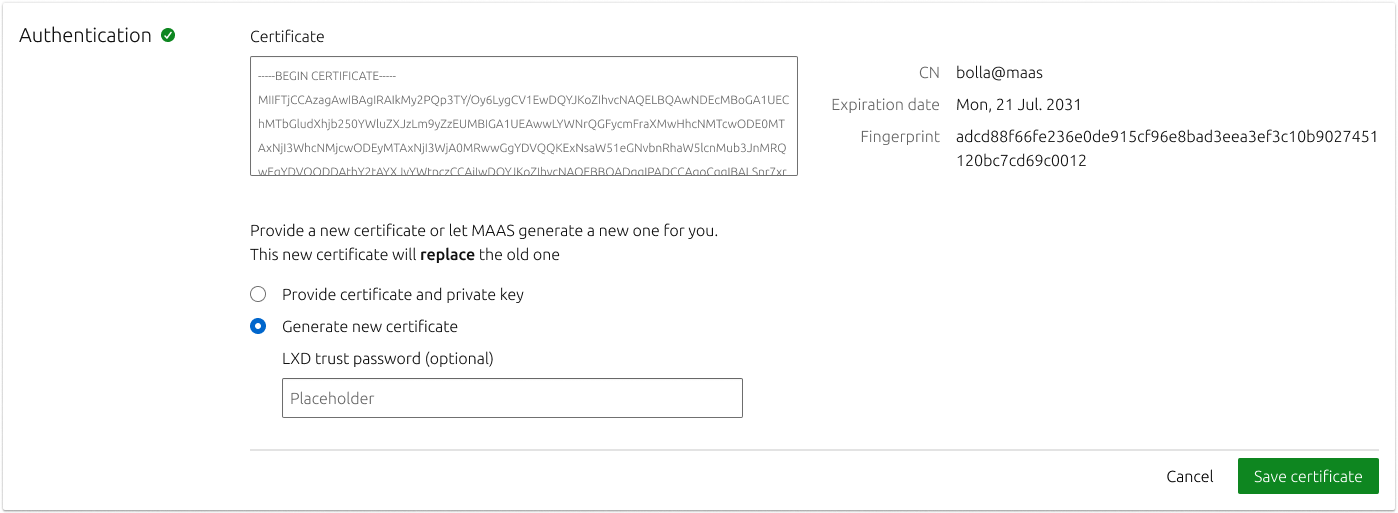
- Users should be able to provide an external certificate with its private key.
- They could also generate a certificate in MAAS.
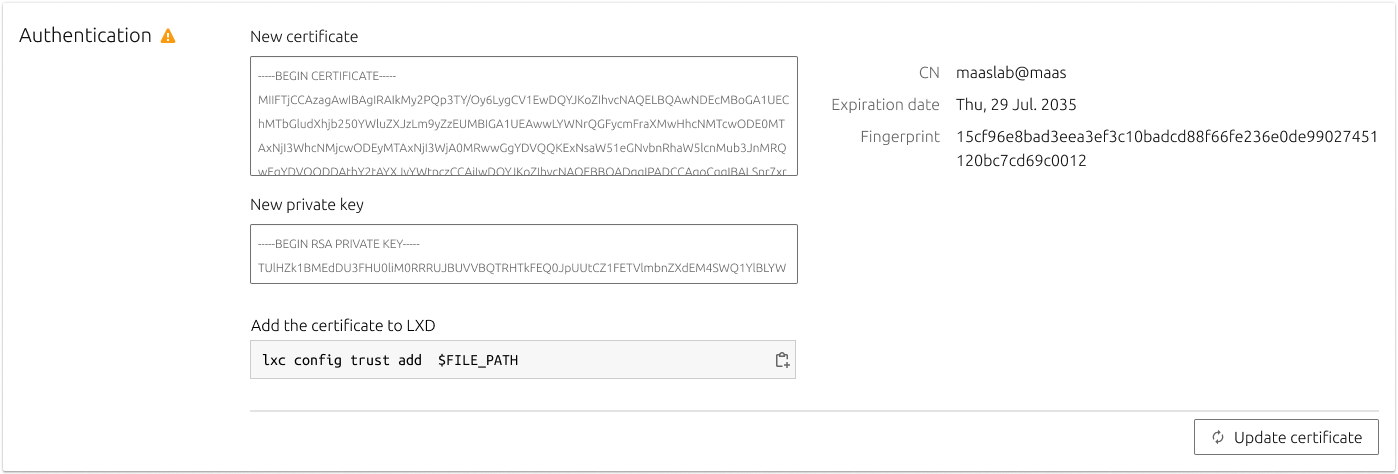
- Certificates have to be trusted in LXD through a CLI command.
- Authentication details and the ability to renew the certificate should be included in the Settings section of KVM.
With that in mind, we took the current flow and added some functionality in a prototype.
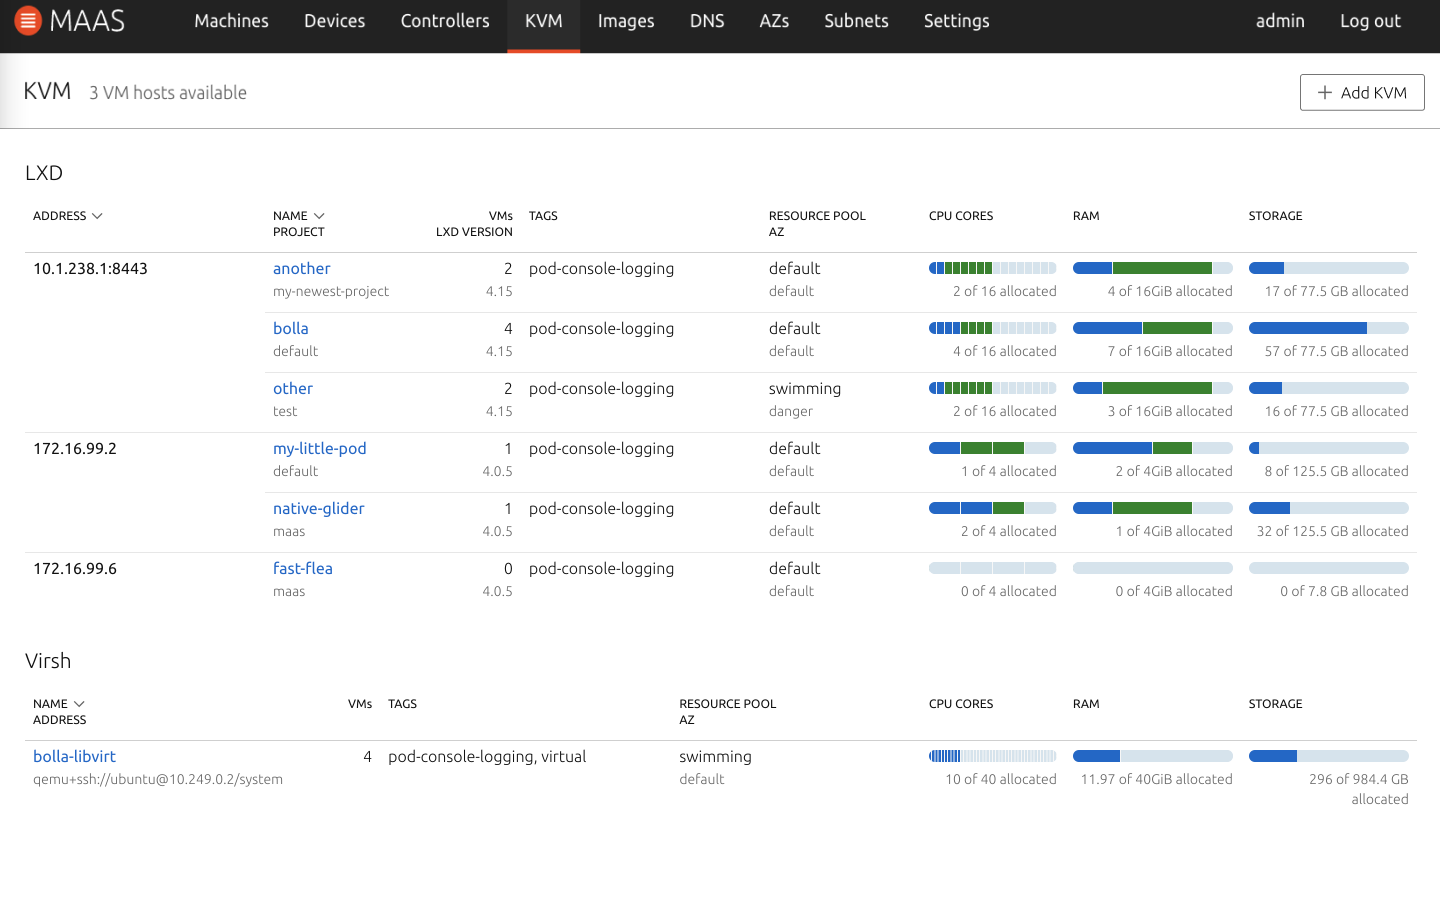
From the KVM section, clicking on Add KVM a form will show up. Instead of the authentication password, now we have two authentication options:
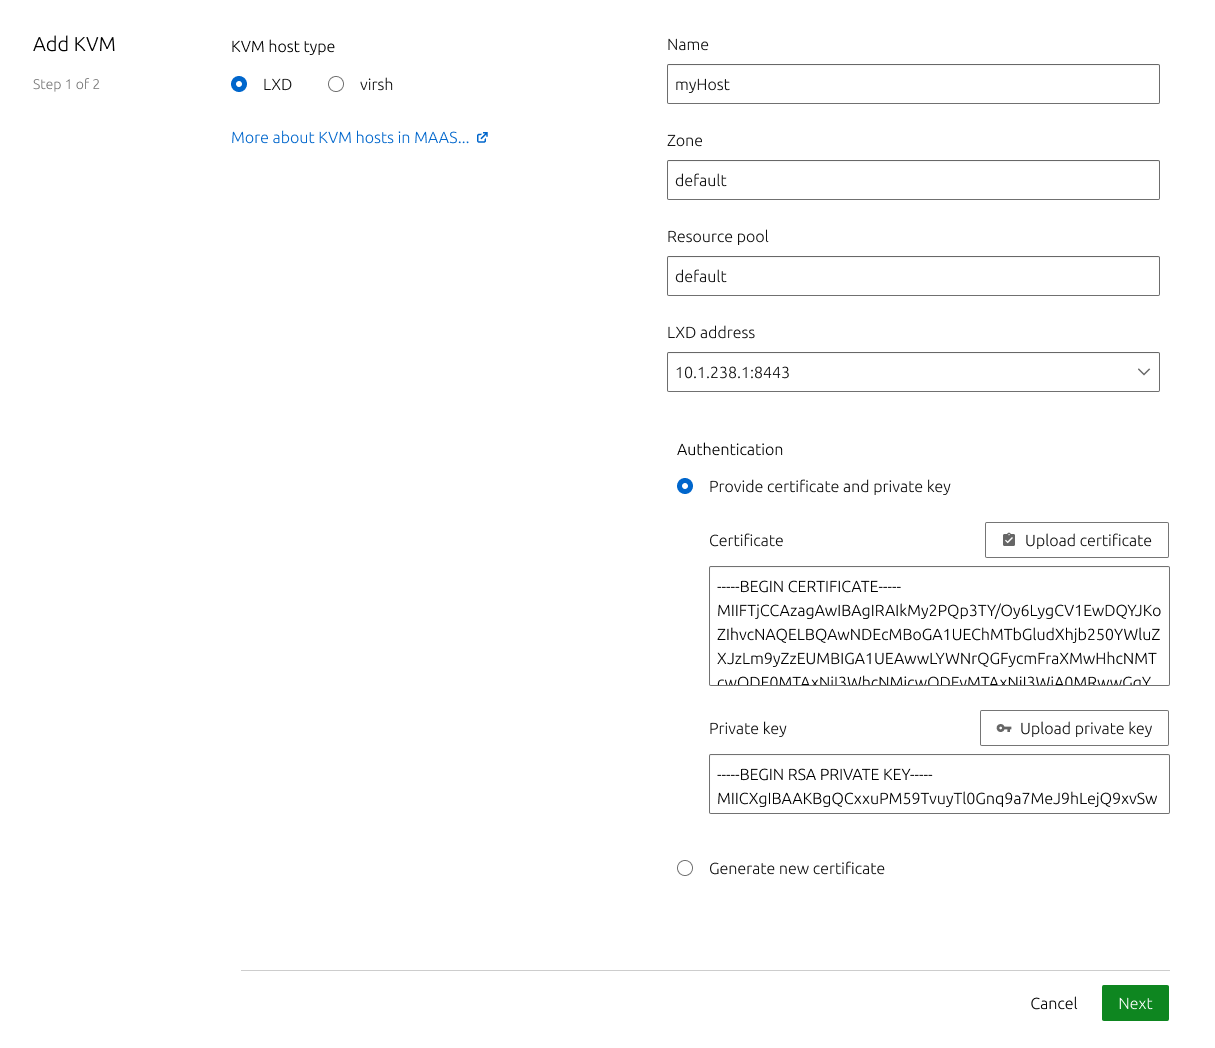
Users can either provide a certificate or generate it in MAAS. After that, the certificate has to be trusted in LXD.
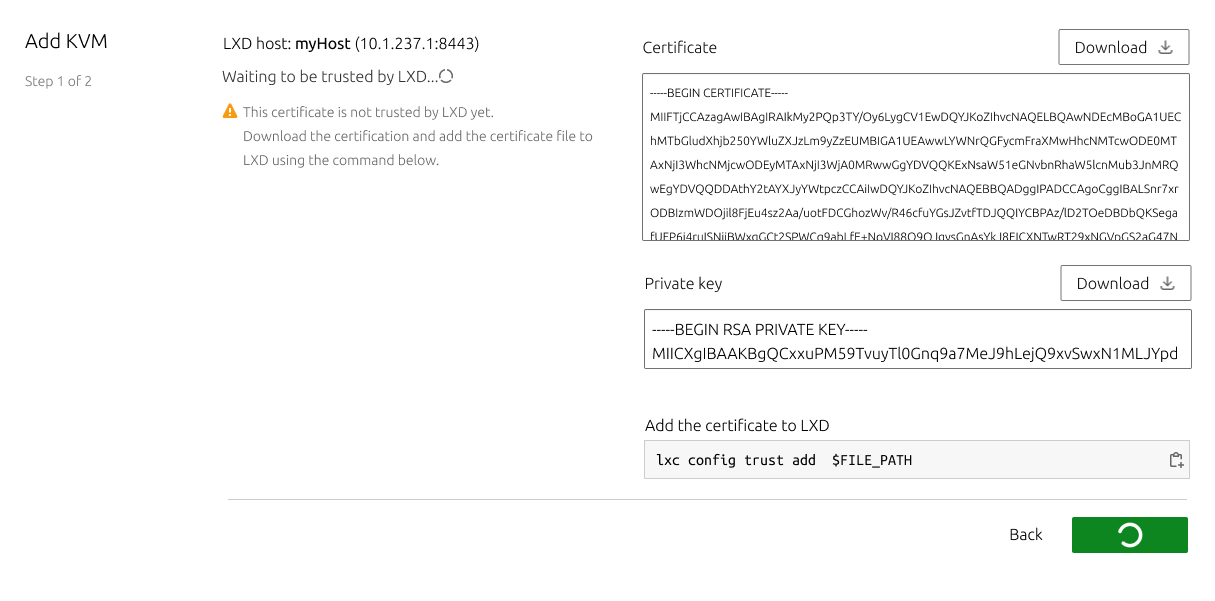
As soon as it is successfully trusted, MAAS will fetch the LXD projects, users will select one or create a new one, and the process will finish there.
The new KVM will be connected to the LXD server as long as the certificate is valid. In order to manage the authentication details, a new section called “Authentication” has been created inside the Settings tab. This section contains the certificate with its CN, expiration date and fingerprint.
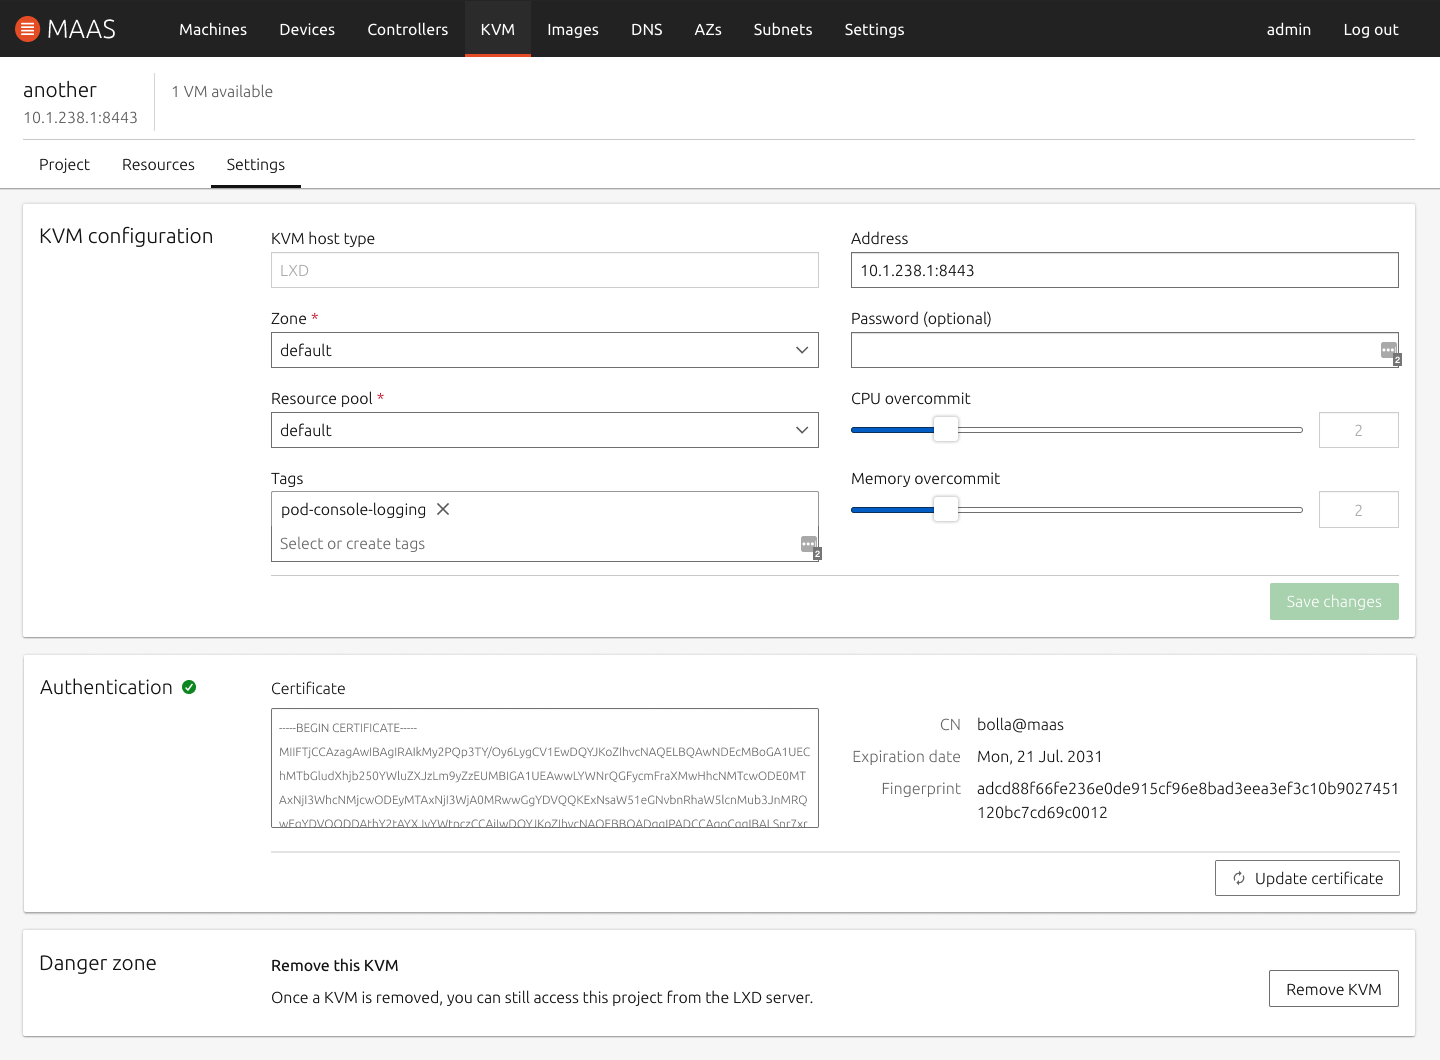
A button allows users to manually Update the certificate. The process is exactly the same as for the first certificate: provide it or generate it, and trust it in LXD.
Finalising the cloning UI design
We completed the high-fidelity visual designs of the Cloning UI feature:
Searching and selecting a machine to clone from: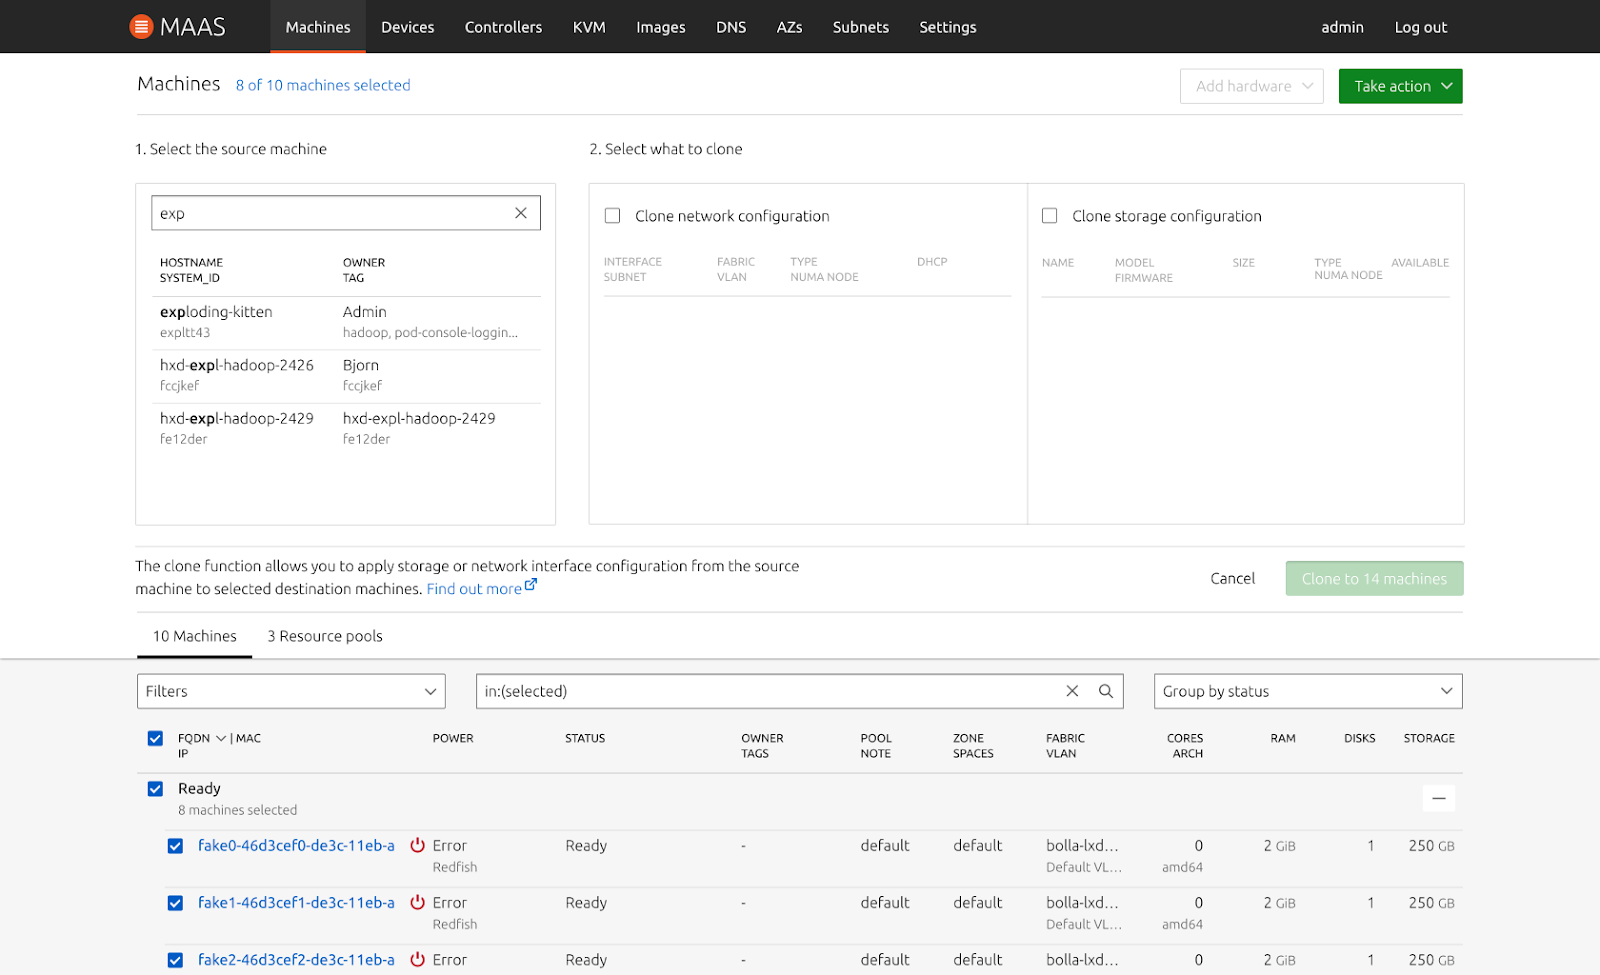
Selecting what to clone from the chosen machine: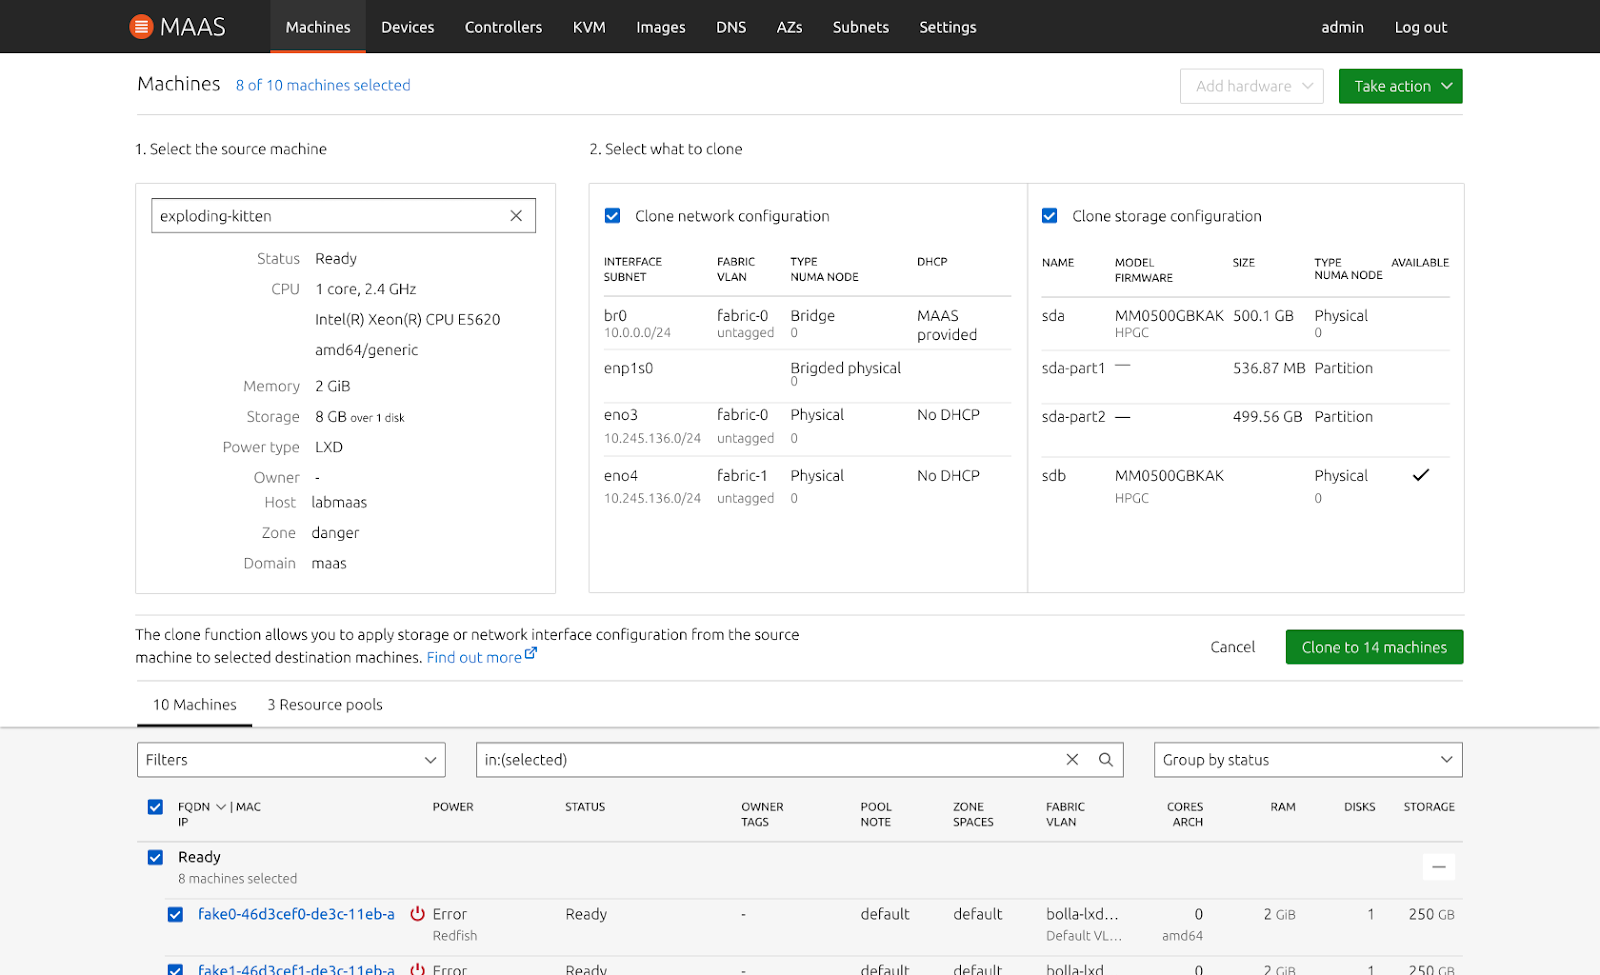
Reporting any errors that occurred during the process
In a slight departure from the original plan, we group the errors by type of error (there are 5 possible error types), rather than reporting them per machine, as there could be hundreds of machines and a list wouldn’t be useful.
One of the problems that we tried to solve in this iteration was how to show the failed cloning machines in a scalable way. For instance, if someone decides to clone 100 or perhaps, 1000 machines, how might we show these errors in a way that is efficient?
We’ve learned from our cloning API that there are 6 criteria for cloning to be successful, meaning they will clone successfully in a homogeneous hardware environment. For instance, the source and destination machines need to be in the same boot method, have the same physical interface, same block device, and the destination disk must not be smaller than the source machine. On top of that, destination machines need to be in a valid state for cloning such as ready, failed testing, or allocated. With this in mind, we realised that there will be 5 types of error when the machines fail cloning. So we solve this problem by grouping the failed machines with the same error message in one bucket. As shown in the image below.
Instead, clicking on the error type filters the machine list to display all the machines that encountered the respective error. This will create a persistent url that can be navigated back to in case you move away from the page.
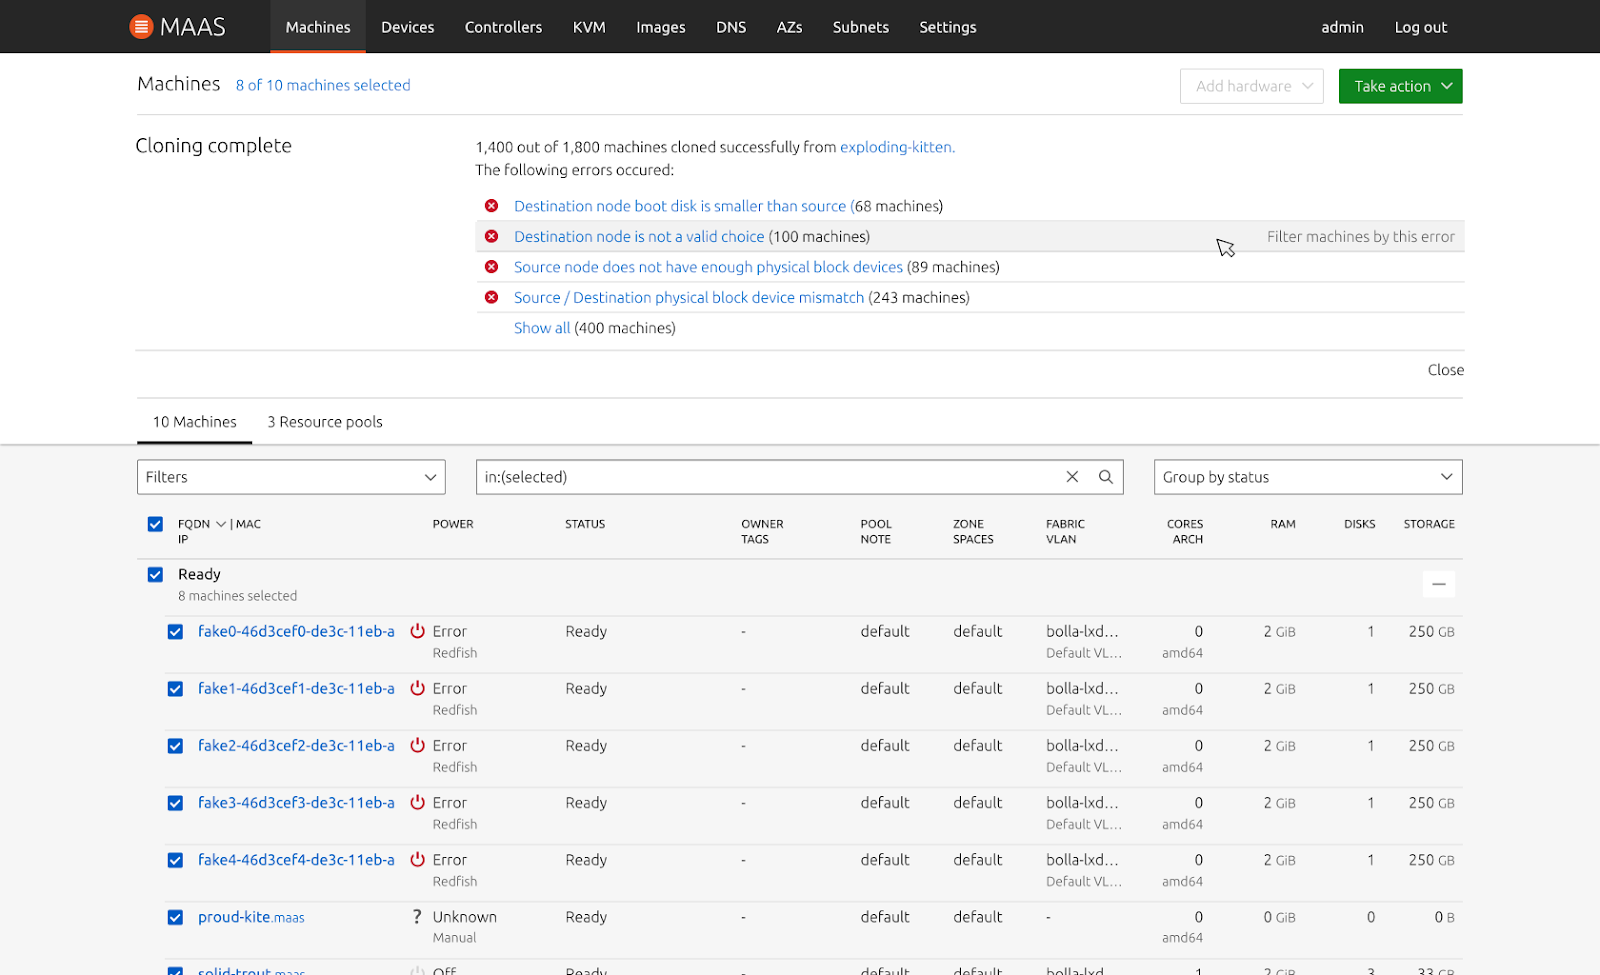
The blue link shows the error message and once clicked, it will filter the machine list to show only those machines. A failed cloning machine can have multiple error messages, however, when you filter them, you will be able to see the failed cloning machine in multiple error categories.